
Whether you’re printing business cards, brochures, packaging, or wedding invites, one thing is certain—your final print is only as good as your artwork file.
At Veesham Printing Press, we’ve seen it all: amazing designs ruined by low-res images, logos that pixelate on print, or text that accidentally gets trimmed off. The good news? Most of these issues are avoidable with a little prep.
If you’re wondering how to prepare artwork for printing, this guide covers the basics—without the jargon. Let’s make sure your next print job comes out exactly how you imagined.
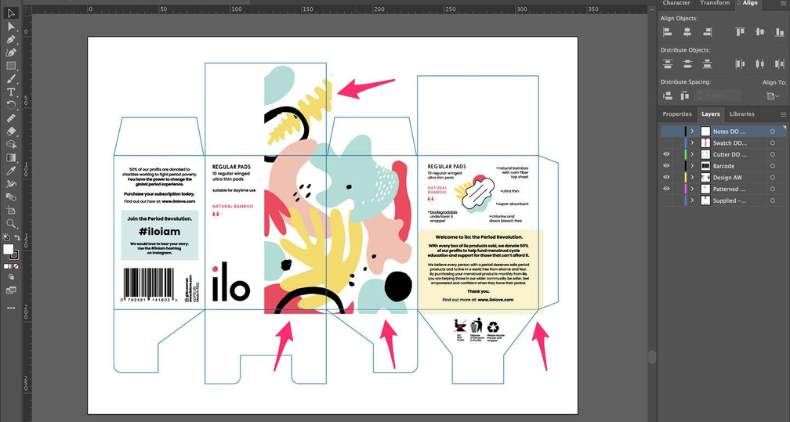
Table of Contents
ToggleSteps to follow for a perfect print setup
1. Choose the Right File Format
Not all file types are print-friendly. Here’s what we recommend:
PDF (Preferred): Keeps layers, fonts, and quality intact
AI / EPS: Best for vector logos and illustrations
TIFF: Great for high-resolution images
Avoid low-res JPGs, PNGs, or screenshots
💡 Tip: Always embed fonts or outline them to avoid font mismatch.
2. Set Your Colors to CMYK
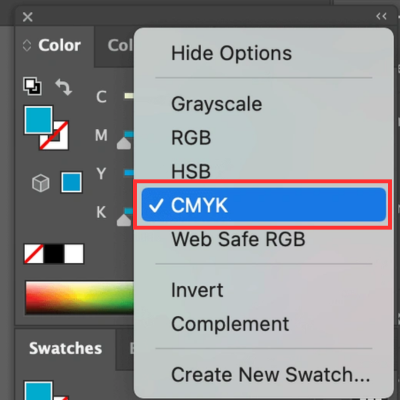
Your screen displays colors in RGB, but printers use CMYK. If you don’t convert the color mode, your print might not match what you see on screen.
Convert artwork to CMYK before sending
For brand consistency, use Pantone colors where possible
💡 Tip: CMYK colors may appear slightly duller than RGB — always ask for a proof if unsure.
3. Use the Right Resolution (300 DPI)
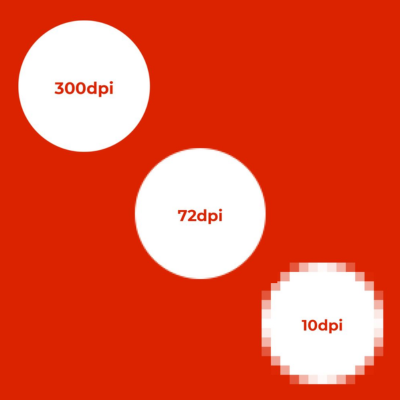
Images pulled from websites (usually 72 DPI) will print with a blurry appearance. For sharp, professional results, make sure all images and graphics are at least 300 DPI.
Logos, icons, and illustrations should be vector-based
Avoid scaling up low-resolution images
💡 Tip: Zoom in to 100% in your design software — if it looks blurry, it’ll print blurry.
4. Add Bleed and Safe Margins
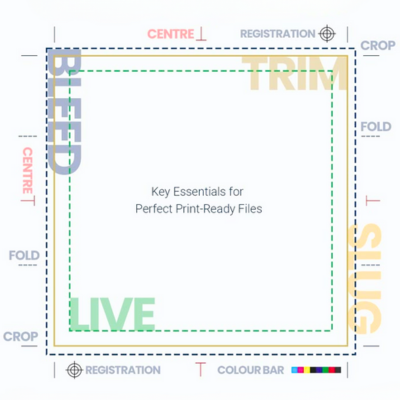
Printers need a bit of extra space around your design to trim the edges cleanly.
Add a 3mm bleed on all sides
Keep important text/logos 5mm inside the trim line
💡 Tip: Include crop marks in your final file to guide our finishing team.
5. Name and Package Your Files Properly
A well-organized file saves time and reduces back-and-forths.
Use clear file names (e.g., “Veesham_Brochure_Final.pdf”)
Include all linked fonts and images if sending design files
Provide a print-ready PDF and an editable version (just in case)
6. Double Check Before Sending
This may sound basic, but it’s crucial:
Spellcheck all text
Ensure logos are in the right format
Double-check alignment and image placement
Review color values, bleeds, and file size
💡 Tip: If you’re unsure, ask for a digital proof — we’ll send one for approval before printing.
Need Help? That’s What We’re Here For
At Veesham, we’re more than just printers — we’re your partners in getting it right. If you’re not confident about file setup, our design team can help clean up, fix formatting, and even create artwork from scratch.
We’ve worked with agencies, corporates, startups, and creatives across Dubai — and we know what it takes to get artwork print-ready with no surprises.
Your Takeaway
Knowing how to prepare artwork for printing can save you time, money, and headaches. A few simple steps ensure your design comes to life exactly how you imagined — crisp, clean, and on point.
📩 Need help with your next print project? Send us your artwork, and we’ll check it for free before going to print. Or stop by our Al Quoz press to talk to our expert team in person.